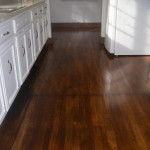
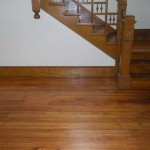
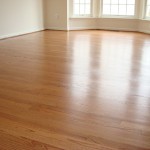
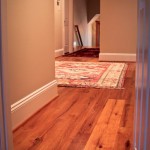
Your Go-To Guide For Refinishing Wood Floors
Your home’s once beautiful wood floors have lost their luster. But take heart—refinishing wood floors is totally doable and will make them sparkle and shine like new. Obviously you could hire a professional to complete the work on your wood floors. If you’re feeling confident in your DIY skills, you could do the work yourself. Either way, there are two possible ways to restore the shine to your hard wood floors—rebuffing the finish or sanding and finishing your floors.
Refinishing wood floors via rebuffing the finish is considerably less complicated than sanding and refinishing. The process centers on the clear protective coating with which your wood floor is covered. After a while, that coating becomes scuffed and scratched through normal everyday use. However, even with all this wear and tear, the wood planks themselves could very possibly remain undamaged—this is when rebuffing is your go-to option.
If you choose to hire someone to refinish your wood floors, the refinisher will employ a floor rebuffing tool and, most likely, several different grits. The use of these tools, referred to as screening, ensures that all those dings and scratches are removed from the previous topcoat. Then a new topcoat completes the refinishing job. This process becomes somewhat dicier if you’ve used an oil soap or waxed-based product on your floors; that extra residue will have to be removed before the buffing and screening in order for the new topcoat to dry correctly.
Should you decide to go the DIY route for rebuffing your wood floors, be prepared to rent a buffer and buy a sufficient quantity of quality finish for your floors; a gallon of finish re-coats a room that is about 225 square feet.
And here’s a do-it-yourself tip for ascertaining if your wood floors have been waxed or cleaned with oil soap: pick a small, inconspicuous area of floor on which to buff the old finish, and apply a small amount of the new topcoat over the area. If it easily sticks and quickly dries, then you are good to go! If not, then you’ll have to strip the wax or oil soap residue with a mixture of ammonia and water or a store-bought stripping product before you begin.
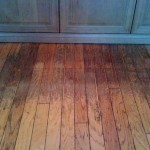
If the actual wood of your floors is damaged, then refinishing wood floors through rebuffing won’t do—they will need to be completely sanded and refinished. This process involves several steps.
- First, an inspection is done where the floors are inspected and measurements are taken to ensure that there remains enough solid wood for the flooring to withstand a complete sanding job.
- Then the floors are sanded down to the bare wood; this is an unavoidably messy step, using fine sand paper.
- Once a heavy duty vacuum is used to remove the abundant dust, filler is applied to any holes or cracks. The desired stain is then applied, with possibly some sanding between coats to ensure smoothness.
- The last step is the application of the topcoat or finish. Whether you choose an eco-friendly water-based finish, the standard polyurethane finish, or the super-strong acid-cured finish, the finishing process will require two to three coats.
If you’re brave enough to tackle this yourself, be ready for a very labor-intensive, mass mess-producing experience, for which you’ll need high quality dusk masks or perhaps even a respirator, goggles or other protection for your eyes, plugs or the like to protect your ears, plastic sheeting to cover doorways and lessen the spread of dust through your house, a sander and sandpaper, your chosen stain, wood filler, and the finish of your choice.
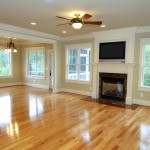
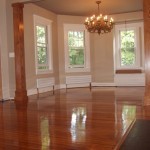
Whether you refinish your wood floors by rebuffing or sanding and refinishing, hire a professional or go the DIY route, all the work and inconvenience will be absolutely worth it when you see your beautiful, dazzling wood floors.
Gallery of Your Go-To Guide For Refinishing Wood Floors


Other articles you might like


Tell us what you think about "Your Go-To Guide For Refinishing Wood Floors"?