distressing wood furniture

Are you looking for tips on how painting wood paneling is done? If you are then continue reading. Here are some great ways to paint wood paneling and transform an old wooden panel into something modern or something new. As they say, repainting is one of the easiest and cost effective ways to revive any wooden furniture. It is also one of the best ways to distress wooden furniture. Let’s find out these efficient ways:
Repainting old wood panels and furniture
Reminder: wear safety clothing when using paint, paint thinner and paint remover. Open doors, windows and other exhaust systems in your home if you are working indoors. Protect surfaces by placing newspapers along the area.
Before you start painting wood paneling, prepare the surface first. Place newspapers or tack cloth on the floor where you will be working. Place masking tape along the area of the wall or area of the area of the furniture that you do not want to be painted. If there is old paint on the surface of the wood panel, remove this layer with the use of paint stripper solution and a flat paint remover tool. Apply the paint stripper as indicated in the product label and wait till the solution works. You will see that the paint stripper has worked when the paint begins to bubble and remove easily. After 15 to 20 minutes, the old paint is ready to be removed. Use rubber gloves to protect your hands. Use the flat tool to remove all the paint from the panel.
After you have removed all the paint, use sandpaper with a large grain to sand all the surface of the panel. You need to sand every inch carefully even the edges of the wood. You will see that there are cracks, nail holes and other imperfections along the wood grain. You need to remove these with the use of plaster. You can purchase plaster in powdered form in most hardware stores. You will need to prepare this according to instructions indicated on the packaging. Apply the plaster along the areas where there are imperfections. Apply plaster several layers at a time. Allow the plaster to dry for about an hour afterwards sand the area completely. Apply another layer of plaster, dry the area and then sand it completely. After this you may now apply your first coat of paint.
For wooden panels along windows and entryways you may use a 1 inch brush. Start painting from the top of the panel downwards in smooth and even strokes. If you are working with a larger panel, a roller would be better so you can save time. After you are done with the first layer, allow this to dry completely for about an hour or two. If you are painting outdoors then your wood panel would dry faster. Apply the next coat of paint when the first layer has completely dried up.
Applying paint and distressing wood panels
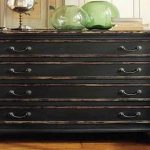
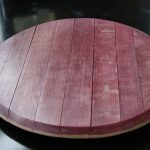
Distressing is making wood look older than what it really is. This technique is used in recreating antique furniture and is also used in making shabby chic furniture pieces. It is very easy to distress furniture but it takes a lot of time and patience to do so. You will be working with two kinds of paint. One has to be brighter than the other and if possible the brighter paint color has to be applied first and then the other color on top. You may also work with three colors and this of course takes more time and effort. Perfect your skills on two – color distressing methods first before you proceed to three-color method.
First prepare the wood panel that you want to distress by stripping off all the old layer of paint. Apply paint remover and then wait for about 15 minutes for paint to peel off. It may take time to remove old paint especially if there are many layers of paint. Use a flat tool to scrape off all the paint. Again, wear protective gloves before you ever handle paint products. Scrape all the paint and then afterwards use sandpaper to completely sand the surface out. Take care to remove all paint since you will need to show the paint layer that you will be initially applying.
When the surface is basically paint-free, apply the initial layer using a brush if you are working with a small panel and a roller for larger panels. Apply paint evenly with long strokes. Let this panel dry completely before applying another layer. Once the second layer is done, apply the next color of paint and this time apply only one layer. Allow this layer to dry out completely for at least a day before you start distressing your wooden panel.
Distressing is done in so many ways but the most common and the easiest way is to scrape the outer paint color to reveal the first coat. First find the places or the areas of the furniture or wooden panel that you want to distress. In chairs, the handle, feet and the backrest gets to be distressed first. In tables, the exposed flat surface on top and the legs are distressed while cabinet doors on large cabinets and shelves are also treated.
Use a medium-grain sandpaper and gently but firmly sand the area that you wish to be distressed. Sand till you see the color of the first layer. Do this in an irregularly-shaped manner so that the furniture or wood panel appears to have naturally acquired the bruise or the scrape. Finally use a fine –grain sand paper to polish what you have created. The distressed areas need to look natural so create small scrapes along different areas if possible.
Painting wood paneling by distressing the wood is a handy technique if you want to create lovely distressed furniture pieces. There is a huge market for these pieces and if you perfect your skills early and efficiently you may find this project very lucrative with furniture enthusiasts!
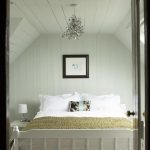
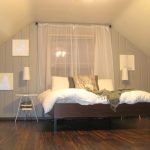
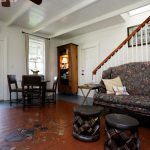
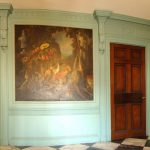
Gallery of distressing wood furniture


Other articles you might like


Tell us what you think about "distressing wood furniture"?